Tuesday, June 27, 2017

Fresh Baked Bread

There's nothing like loaf of fresh bread from the oven. The smell especially! I love when it all comes together. It can be a bit of gamble on whether or not it's going to work. Is the yeast still good? Did I have the temp of my liquid right? Did I add too much flour? Is my seasoning right? But when all of that comes together in harmony, it's the best!

Now I'm not going to call this recipe fool proof, but the powers that be for yeast doughs saw fit to grant me an amazing loaf, plus some extra for thin crust pizza. The nice thing about making the bread yourself is you can add what you like as long as you have a good base of flour and liquid to dry ratio is right; add away. You often have to add more flour and even a bit more liquid, it's all in how the dough looks and feels. Go ahead and play around with this recipe and tell me how it turned out.

There she is folks! I'll just be over here with my bread. 
Bread with Flax Meal and Oats

3 1/4 Cups All Purpose Flour (plus extra for kneading and rolling it out)
1 Cup Warm Water (105 degrees or about as hot as your hottest tap water)
1 Package Active Dry Yeast(2 1/4 tsp)
2 Tbsp Ground Flax Meal
1/4 Cup Rolled Oats
1/4 Cup Almond Milk (or milk of your choice)
1 Tbsp Oil
2 tsp Vinegar
1 tsp Baking Soda
1 tsp honey
1 tsp Salt

Add your yeast to the warm water and let sit for about five minutes, it should look creamy and slightly foamy. 
While your yeast blooms, put aside the 1/4 cup of flour and in a large bowl mix your dry ingredients together . Make two small wells with a table spoon in your flour mixture and put the oil into one and the vinegar in the other. 
Add in all of you liquid and stir until you've created a shaggy mess, then add you almond milk, stir, stir, stir. Then finally your reserved 1/4 cup of flour and mix it in. 
Cover with plastic wrap and let rest for about 10 minutes. Meanwhile sprinkle flour onto a board and when the 10 min is up plop it out onto your floured board, sprinkle a bit more flour onto the dough itself and go to town kneading it. When it reaches a sticky state add more flour and continue kneading. All in all you should knead it for about 7 minutes. 
Form it into a ball and sprinkle with more flour.
Now you'll need a rolling pin, flour that as well and then roll out the dough until it's about 12x10. Cut off about two inches and that is what is left for your thin crust pizza.
With the larger portion of dough, roll it  tightly together starting from the short end, pinching the seams together as you go. 
Seam side down plop it into a greased bread pan 9x3. Cover and let rise in a warm place for about and hour or doubled in size. If you don't think you'll use it right away do not leave to rise. Put in an airtight ziploc bag and store in the freezer. When ready to use, let it thaw on the counter in your greased pan and it should rise nicely, just give it some extra time.
Now if you're going to bake it right away, Preheat oven to 375 degrees F smear the top gently with butter if you like, but it's opt and bake for 30 minutes. It should be golden brown and sound hollow when tapped on top. Let Cool in the pan for about 10 min and then remove from pan and let cool the rest of the way on a wire rack, the top of your stove works nicely if you don't have rack. I was naughty and snitched a piece while it was still warm. It needs to cool for at least half an hour otherwise it's kinda doughy.

If you like nuts or dried fruit in your bread feel free to add it in, and even sprinkle some on top.
This can easily be made into a sweet bread, just add more honey or sugar if you prefer, any type of sweetener really. It would make a good cinnamon raisin bread, when it comes time to roll into a tube, sprinkle with cinnamon and sweetener along with your raisins and voila! A whole new bread.
As for making it with whole wheat I don't know how it would do since whole wheat tends to be heavier. It may just require more yeast.
I hope you all enjoy. So...Happy Cooking my friends and remember to keep Healthy and Homemade

Thursday, June 22, 2017

Eggless "Egg Salad"

You heard/saw it right folks, Eggless, egg salad! My take on a Vegan recipe. I've said in a previous blog I'm pretty much completely dairy-free, albeit eggs are not dairy, but if I decided to do vegan I had to go all the way, otherwise it would've just been vegetarian. Now this recipe uses tofu, if you don't like tofu look away, look away now! Ha! I tout the use of Soyrizo in place of mexican chorizo, it's a game changer for the amount of fat and cholesterol in that stuff! I like tofu because it's like a blank slate, you can make it into anything and its taste is that of whatever dish or seasonings you use it in and with. I picked up a block of organic firm tofu from Trader Joes and it did not disappoint.
A 3oz serving is 91 calories and packs 10 grams of protein, calcium and iron. Bonus it's low in carbs.

The one on the right is what you need to look at. The other is from my Tuna Salad post. It's just before this one, check it out .https://sareneefood.blogspot.com/2017/06/salads-galore-tuna-salad.html

Eggeless "Egg Salad"
This serves one

3 oz Firm Tofu
1/2 a serving of Garbanzo Bean Puree(I made my own, that recipe below)
A pinch of onion powder
A few dashes hot sauce(opt)
1/2 tsp Dijon Mustard
1/2 tsp Sweet Relish
1-2 tsp Nutritional Yeast(depends on how cheesy of a flavor you want)
Salt and pepper to taste

Crumble your tofu into a bowl and add in the rest of your ingredients and 1 tsp of the nutritional yeast, mix well and taste to see if it needs more salt or if you like it "cheesier" more nutritional yeast. Add in what you think and voila eggless "egg salad". See not so scary! Next up my Puree, I don't think it can be called hummus because I didn't use tahini paste.

Garbanzo Bean Puree
This is one serving, but I only used half of it in the salad recipe

1/2 cup Canned Garbanzo Beans(drained)
1 Tbsp Almond Milk (or milk of your choice)
1 Tbsp Water
1/2 tsp Apple Cider Vinegar
A few leaves of cilantro (sorry it's not exact, I just threw this together, use however much you like or any other herbs you prefer)
Salt and Pepper to taste

I use a Ninja with one of the single serve smoothie cups.
Toss all of the ingredients into the container and blitz away, you want a very smooth paste, no chunks since it's acting as the mayo. Taste and see if it needs more salt, add if need be.

Now to layer up a wrap as pictured...
Use 1/2 of a Whole Wheat Lavash (yes from Trader Joes) and put a third of the mixture on half of the lavash(you're going to roll it) place a lettuce leaf on top of that, then put another third and another lettuce leaf and then the rest of the salad. Fold the lavash over and you should be able to fold it over again. There it is! A yummy lunch or in my case breakfast. It was so tasty. Go ahead try it, make my day. I even cut it on a bias, so fancy!

Happy Cooking my friends and remember to keep it Healthy and Homemade.


Salads Galore (Tuna Salad)

Salads and Summer is there anything better? I guess there is, but I'll let you pick your favs. I happen to make a mean potato salad, oooh next blog! Well after a lovely post for an eggless "egg salad", yes you heard right and you'll just have to go to the next page to see, Hehe. Today though I'm going to post twice. This first one is a typical tuna salad and it's a go to for quick protein and light comfort on a hot summer day. I'll even give you some healthified(I don't think that's a word, but what the hey, I'm gonna use it) options.


It's the one on the left you want for this one. I posted this on fb and instagram as a layout and didn't feel like uploading from  my phone.


Tuna Salad
This amount is for 3-4 people

1 12 oz Can Solid White Albacore Tuna packed in water
2 heaping Tbsp Mayonnaise 
1 Tbsp Relish
1/2 tsp mustard
1/2 Cup diced Celery
A few dashes hot sauce (opt)
Finely chopped onion or a pinch of onion powder for those who don't like raw (opt)

Drain and flake your tuna into a bowl with a fork. Add in all of the ingredients and mix well. Ahh so easy. LOL!
Now for the endless options. 
Throw it on a hollowed out tellera or bolio or french bread roll with some lettuce and tomato and maybe some cheese. Ooooh you could do a tuna melt!! Just pop it under a broiler. Add in some grapes or apple for sweet crunch. Sunflower seeds and sprouts would make it so So Cal. If you want to get crazy and omit the mayo altogether use mashed avocado instead, trust me, it's amazing! Low carb go for a whole wheat lavash bread, I get some really good ones from Trader Joes, put it in a halved avocado(this only has 2g of carbs for a half of one), no carb put it on a lettuce leaf, a stalk of celery, a hollowed out cucumber.

For the pictured version:
1 Brown rice cake
A few slices of thinly sliced cucumber
1/4 cup of the Tuna Salad
A sprinkle of nutritional yeast for cheesy flavor if you like. 
Pile it on and eat it up

So Happy Cooking my friends and remember to keep Healthy and Homemade!


Thursday, June 15, 2017

Healthy Eating

Hello All!

I've been really trying watch what I eat and get in regular workouts. Turing 36 was, well a turning point. Metabolism slows and my metabolism wasn't the greatest to begin with. Plus with two broken bones over a two year span...it totally put a crimp in my style. Haha!
Image result for fringe
Joshua Jackson! Oh yeah!
But after some hard work and better eating I'm down in weight and things that were a snug fit now wonderfully fit again. A gym membership and a  trip to Europe with a lot and I mean 20,000 steps a day kind of walking, I feel fantastic(but that's fantastic news! Ehm, Fringe and Walter, yes I'm a SyFy geek)!
 
Indulgence with Churros con chocolate


Now I do still indulge, but for the most part I stick to a 1300-1400 calorie diet and yes I eat carbs, lol. It's the healthy carbs, whole wheat, fiber, oatmeal, brown rice. I eat a lot of veggies. And, gulp, I gave up dairy, pretty much completely. That's right folks no milk or butter and very very little cheese. I do still have the occasional little bit on my tacos or if there's a scrumptious cheese platter, I was in Spain and France after all. ;-) 

Now for my healthy eating, I eat oatmeal pretty much every morning, I mix it up with what I put in it. I'm even known to put cocoa powder and nut butter in it. Fruit is a good way to go too. I'll mix it up with an egg or a rice cake topped with goodies. Lunch is a lean protein or veggie pattie with raw veggies and a whole wheat something or another, usually from Trader Joes. I also make my own nut cheeze, https://sareneefood.blogspot.com/2017/01/cashew-mozzarella-cheeze-it-actually.html there's the link, you're welcome. I don't make this one all the time, but opt for soaking whatever nuts i'm using over night and then blitz em down in a blender with nutritional yeast, salt and a touch of vinegar.
Dinner is a similar affair to lunch and sometimes I'll bulk up what I eat for lunch and eat a later lunch and then a small snack for dinner.

Here is what my breakfast's look like, I'll even give ya the recipes.

Image may contain: food and indoor
Rice Cake topped with Peanut Butter and Blueberries
Recipe Number One: Rice Cake Breakfast

1 Brown Rice Cake, lightly salted (I got mine from Sprouts)
2 tsp. Peanut Butter, but you can use whatever you like, I love Almond Butter
1/4 Cup Blueberries, sliced in half
6 oz of Almond Milk

Spread the Nut Butter onto the rice cake, then top with the berries. The Almond Milk is for extra protein and calcium, drink up. How simple is that!? 


Recipe Number Two: Oatmeal
No this is not one I made, but hey I was in London and this is similar to how I make it and I don't have a pic of mine. oooh green juice (insert homer sound)
I do have a previous Oatmeal recipe here on my blog, but I've changed it up a bit. i.e. no dairy and another type of sweetener.

1/2 Cup Oatmeal, whatever kind you like
1 Cup of Water
1/4-1/2 Cup Almond or Dairy-Free Milk
Sweetener can be what you like, I use honey or jam, if I'm using fruit to sweeten I opt for dates or a quarter of a  banana, if I'm using a nut butter and it's not sweet enough I'll add a touch of honey or the banana again. With berries that can be tricky, if they're not sweet enough or too tart I'll just add in what I feel I need for it to be a little sweeter 

Take your oatmeal and add it to the pan with your water. Turn heat to medium and let it come up to a boil, then turn down the heat to low, stirring every so often, if using a banana slice thin and add it at this point, let it simmer until thick and creamy looking about 6-7 min. Add in the milk, depending on how loose or thick you like it will depend on how much milk you want to add, stir to combine and let simmer for another minute. Add in your sweetener and whatever other fruit or spices like cocoa powder or cinnamon, Yum! And there ya have it a nice healthy breakfast to keep ya going.
Happy Cooking my friends and remember to keep it Healthy and Homemade!

Tuesday, April 25, 2017

One Serving Chocolate Cake


It was a night craving, hence the pic isn't as glorious, but it's chocolate sooo...yeah. Haha!

I get cravings and if it's not for Tacos it's for chocolate. I've done several variations of a microwave single serve cake and this one is by far my best attempt. Now since I didn't want to use a partial egg for this, this uses a leaving process in something called a Wacky Cake. Here we go kids, time for this lovely, fluffy, glazed chocolate cake.


For the Cake
Half a Square of Semi-Sweet Baker's Chocolate
1 tsp Butter Alternative like Canola Harvest or Smart Balance
2 1/2 Tbsp Flour
1 Tbsp Sugar
1/2 Tbsp Ground Flax Meal
1/8 Tsp Baking Soda
A pinch of Baking Powder
2 Tbsp Water
1 tsp Vinegar

Make sure to use a bowl that is larger than 8 oz and has somewhat high sides. Melt the chocolate and butter in the microwave for one minute.  It won't look very melted, but it is, so stir stir stir until it's smooth. Add in the dry ingredients and combine. It will be crumbly. Next add in your vinegar, you want it to have a slight bubble reaction, if it doesn't, your baking soda might be too old and the cake won't rise properly. This is also why it's called a Wacky cake; the vinegar and baking soda mix together and give it the lift it needs.Now add in the water and stir, it will be liquidy.
Pop in the microwave for 1 min 30 sec. My microwave is old and doesn't have the power of the newer ones, so if you think your micro is more powerful back off the time to one minute. It'll have tiny little holes and have pulled slightly away from the bowl.
Pull the cake out and let it sit on the counter while you make the glaze.

For the Glaze
1 Tbsp Unsweetened Cocoa Powder
1 Tbsp Powdered Sugar
1 tsp Butter Alternative
1 to 1 1/2 tsp water

Mix the cocoa and sugar together. Add in the butter and 1 tsp of water. Mix vigorously. The butter should combine completely you want it just slightly thick, if it's as thick as a pudding you can add the 1/2 tsp water.
While cake is still warm top with the glaze and smooth it over the cake. Enjoy!
Happy cooking my friends and remember to keep it homemade!

Wednesday, April 19, 2017

Chili and Beans


Turkey Chili and Beans


I make chili when the weather starts to get a touch chilly(every pun intended haha), which isn't too often in Southern California. We had a good winter in 2017 and got a lot of the rain we needed to replenish the stores from the 7 year drought. Anyways, enough of my rambling and onto the chili!


1lb Ground Meat(I use 93/7 lean turkey, but you can use whatever you like)
1 32 oz. can Tomato Puree
For the beans I make a pot of fresh Pinto Beans, here is the link if you want to make them https://sareneefood.blogspot.com/2012/08/childhood-memories-and-bean-soup.html
If, however, you don't, use whatever canned beans you like, mix and match to your hearts content. And I recommend getting the ones with no salt as you want use the liquid from the can as well. I don't generally use canned beans for this, so go with your gut, but if I'm guessing i'd say two 32 ounce cans or 4 16 oz.(Sorry the was so long, next ingredient!)
1-2 Tbsp Chili powder (make sure that's all, they can have salt added, you don't want that)
1 tsp Paprika (sweet for not spicy, Hungarian or Regular for a kick)
2 tsp Cumin
1/2 Tbsp Onion Powder
2 tsp Garlic Powder
1/8 tsp Cayenne (optional)
1 Tbsp Oil (whatever you have on hand)
A pinch of Cocoa Powder
1 tsp Sugar(I'll explain later)
Salt and Pepper to taste(seasoning salt can be used as well)

In a large pot (as you can see from the pic, I use a Cast Iron Enamel. Mine is from the Pioneer Woman Collection. I just love her! Can be found at Wal-Mart) I digress.
In a large pot heat oil over med-low heat add all of the spices, with the chili add 1 Tbsp, toast for about a 30 seconds, yes that's it, you do not want them to burn!
Add your meat and turn up the heat to medium, season with salt and pepper, cook through.
Stir in your tomato product, now here is where you add the Sugar and Cocoa Powder. The sugar will cut the acidity of the tomato and the cocoa will give it this wonderful depth of flavor. Let that cook for about a minute.
Now time to stir in your beans.
Taste that wonderful goodness, if you think it needs more chili add the other Tbsp. Add more salt and pepper, if needed and let it cook on low for 1-2 hours, stir every so often, taste and season if need be.
This recipe can be a quick chili, I've found if you're in a hurry half an hour of cook time is just fine. Cooking it longer just means the flavor will be a little richer.
Happy cooking my friends and remember to keep it healthy and homemade!


Wednesday, February 22, 2017

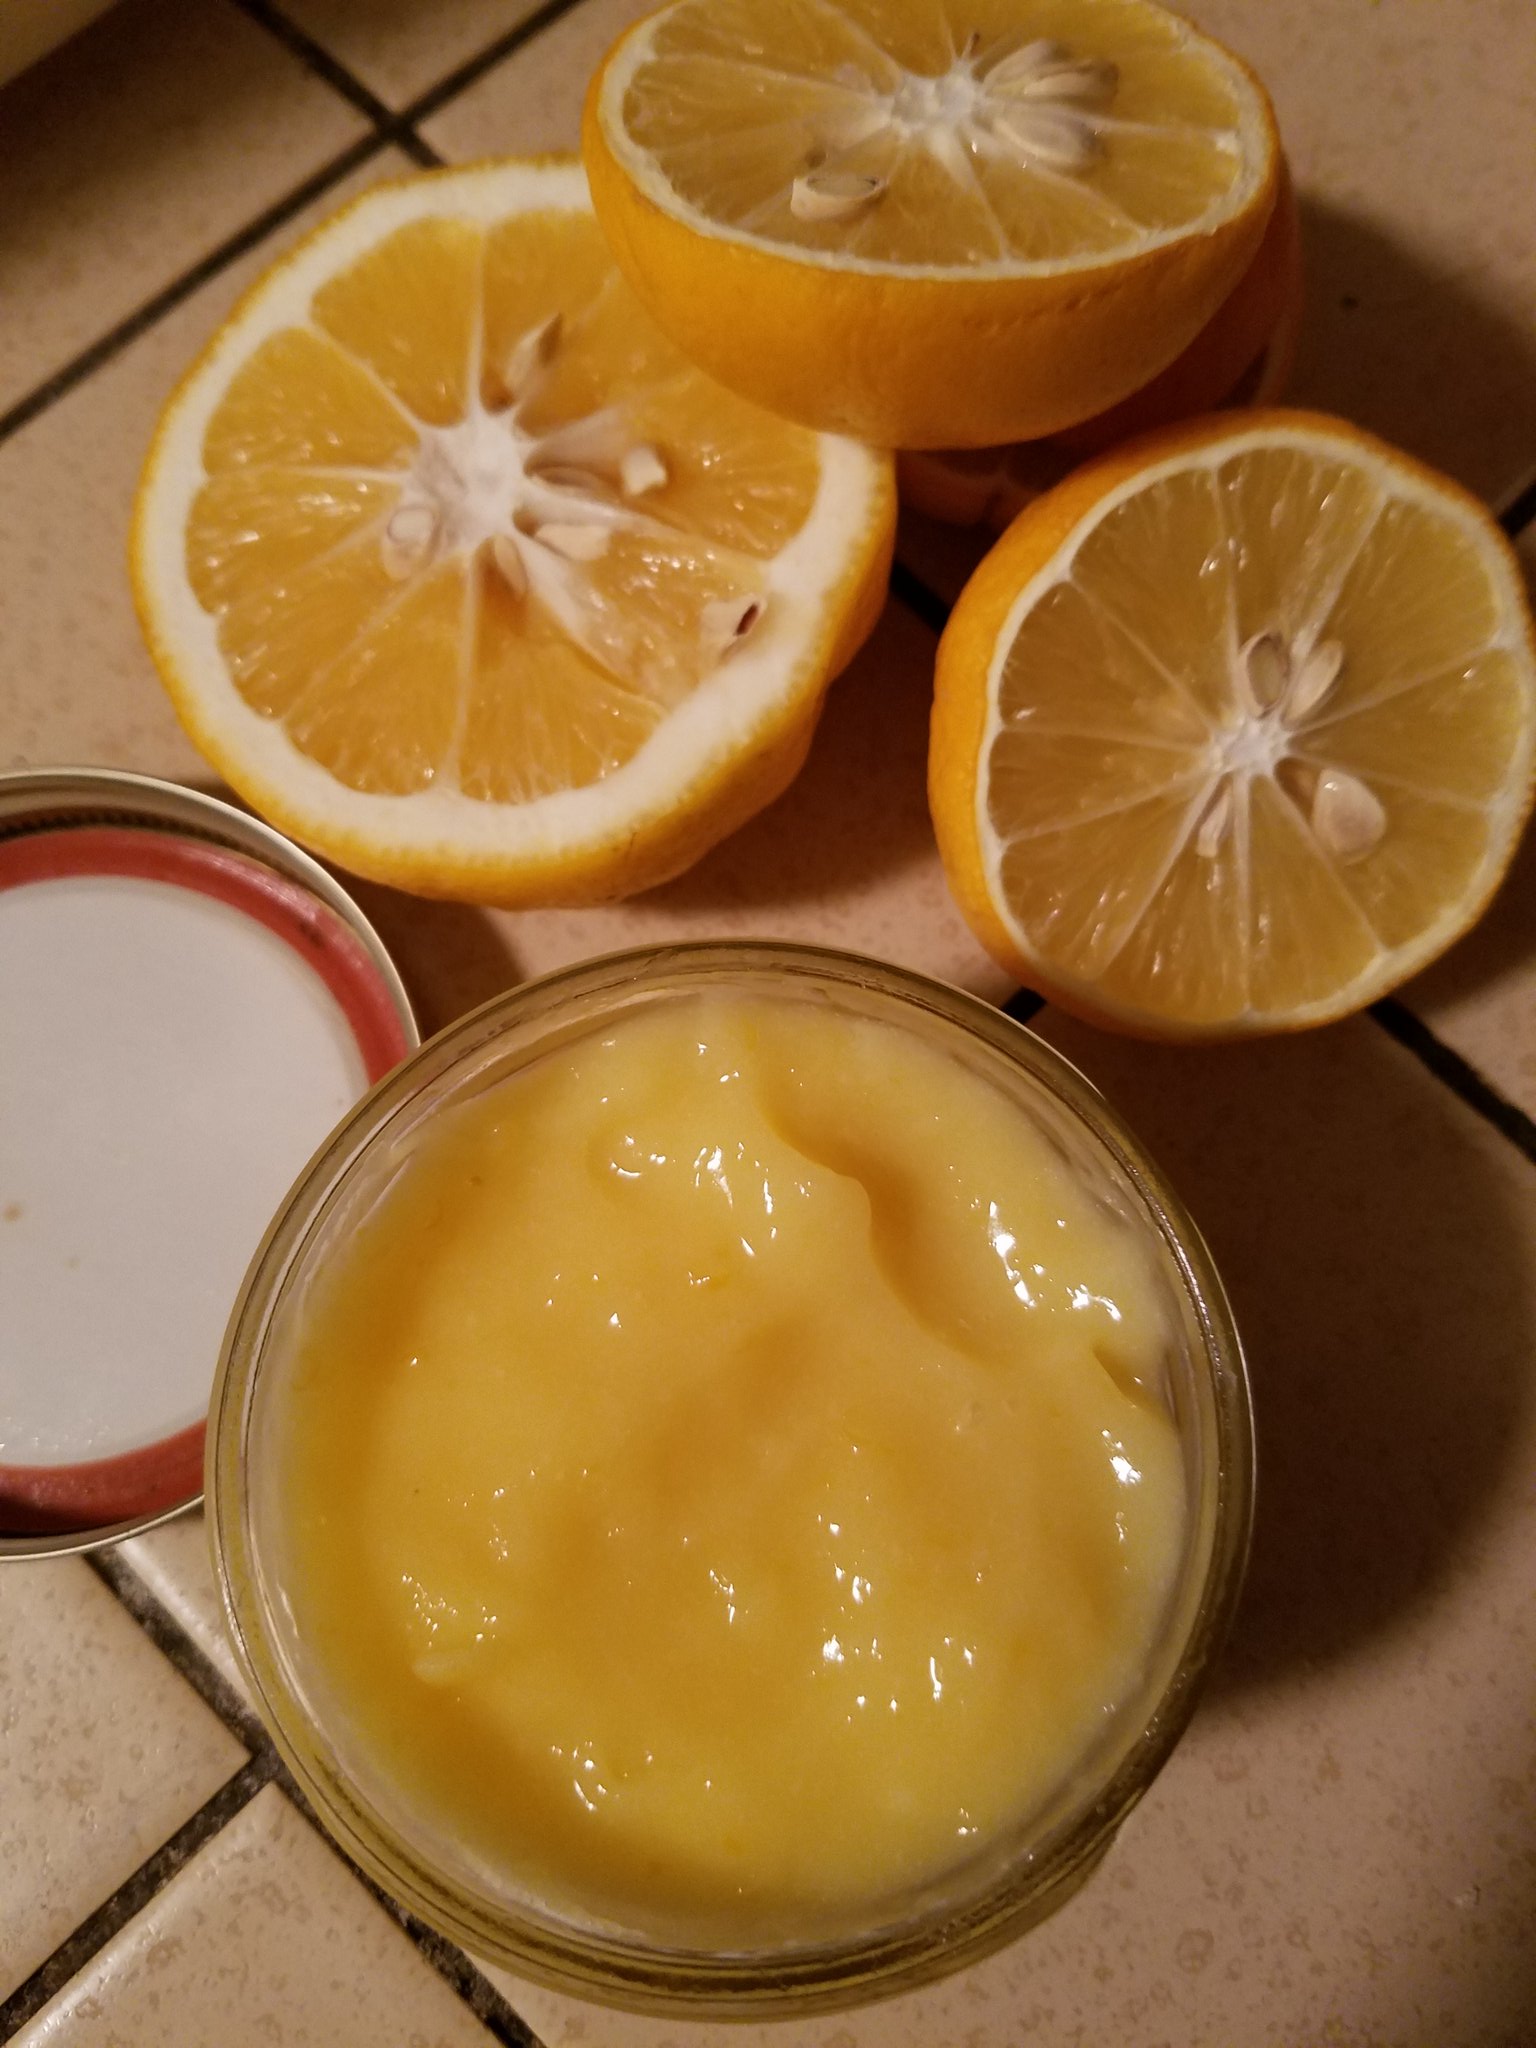
Lemon Curd


Lemon Curd

So Tangy!

This Recipe can be easily pared down, the original recipe has 1/2 a cup lemon juice and sugar with 3 eggs and 3/4 cups butter along with 2 tsp lemon zest. I just amped mine up because of the sheer volume of lemons I had. 

Ingredients:
4 Cups Lemon Juice
3 Cups Sugar
3 Tbsp Lemon Zest
3/4 Cup Butter (Yes I kept this amount the same, hehe)
14 Whole Large Eggs

Combine all of the ingredients in a large pot and cook on med. low, whisking frequently.
It can take anywhere from 10-20 Min to thicken, you'll want a pudding consistency and you should see whisk marks left in the curd when you pull the whisk through. 
Turn off heat and let cool for a min, then put into whatever container(s) you like.
Cover the surface of the lemon curd with plastic wrap, making sure the plastic wrap touches the entire surface of the curd. Put in fridge for an hour or until completely cool. At this point the plastic wrap can be removed and the curd can be stored in jars or an airtight container for up to a week in the fridge.
Sidenote; I gave a jar of this to my pastors wife and she couldn't eat it right away so she froze it and I gave it to her in a glass jar. It froze beautifully for a month and worked great as a filling in the cupcakes she made!
Happy Cooking my Friends and Remember to keep it Homemade!